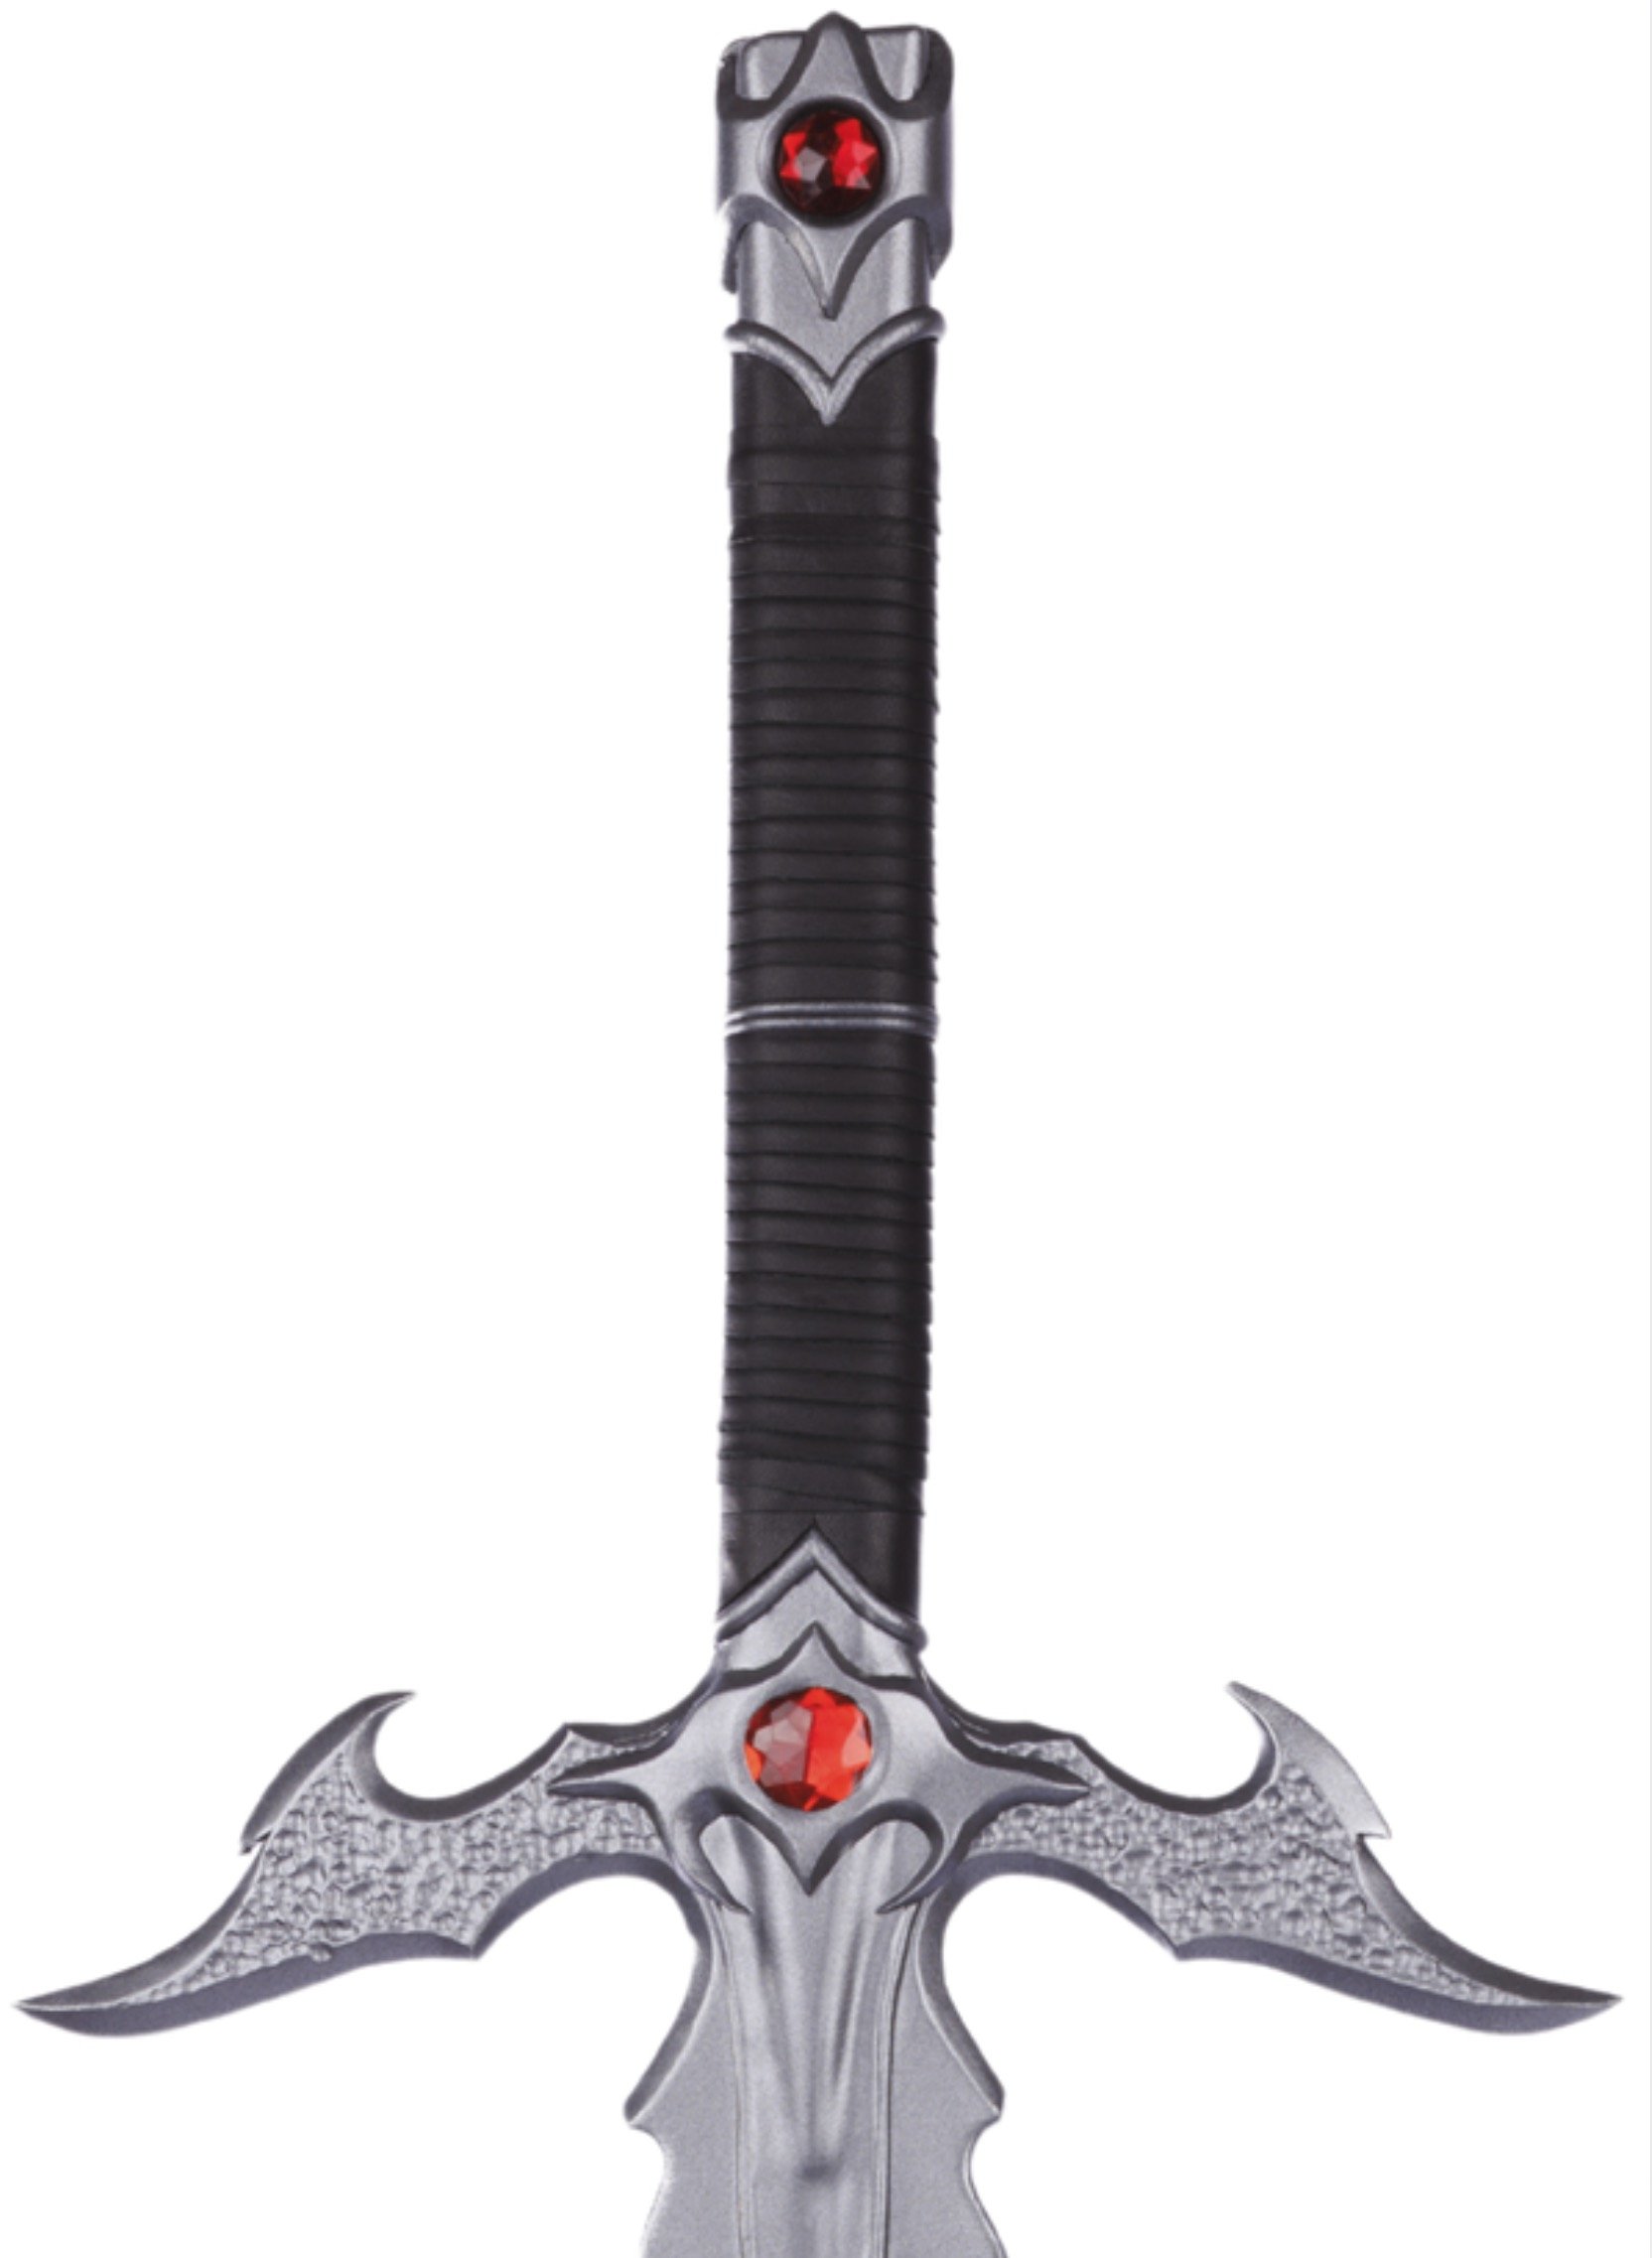
The Sword
This project was sponsored by Plasti Dip
A very special thanks to Plasti Dip, who generously sponsored this project!

I used their new line of Craft products for this project. The silver Armor color was just what I needed, and the coverage is incredible. I will share my tips and tricks for working with this amazing line of flexible rubber paint throughout this write-up.
(As of this article being published), the Plasti Dip Craft line is sold exclusively online at https://plastidip.com/product/plastidip-craft/ with free shipping! Check it out for current pricing, shipping details, etc.


Patterning
This sword design is based upon the Githyanki Longsword from Baldur’s Gate 3! I love the organic designs and the blade shapes. I decided to make a similar sword that borrowed some design elements. I am so happy with the finished result and I hope that this guide can help someone else make a beautiful prop like this! I began the patterning process by scanning the mini-sword.


Making the Base Shape
I resized the sword a little (it’s a huge sword in the game, thus “longsword”). Next, I printed out the pages, taped them together, and traced them to 8mm EVA 70 foam from Coscom Cosplay Supplies. The “70” refers to the shore density of the material. Most EVA foam that is widely found has a shore density of 38. The lower the number, the softer the material. So, a 70 number is a more rigid material, and it was perfect for this project.
I traced the sword pattern to the EVA foam, and cut the shape out with a utility knife. Then I removed enough material from the center to fit a sturdy rod that I found in my garage. A wooden dowel would also work for this purpose! I used super glue to secure the dowel in the core.


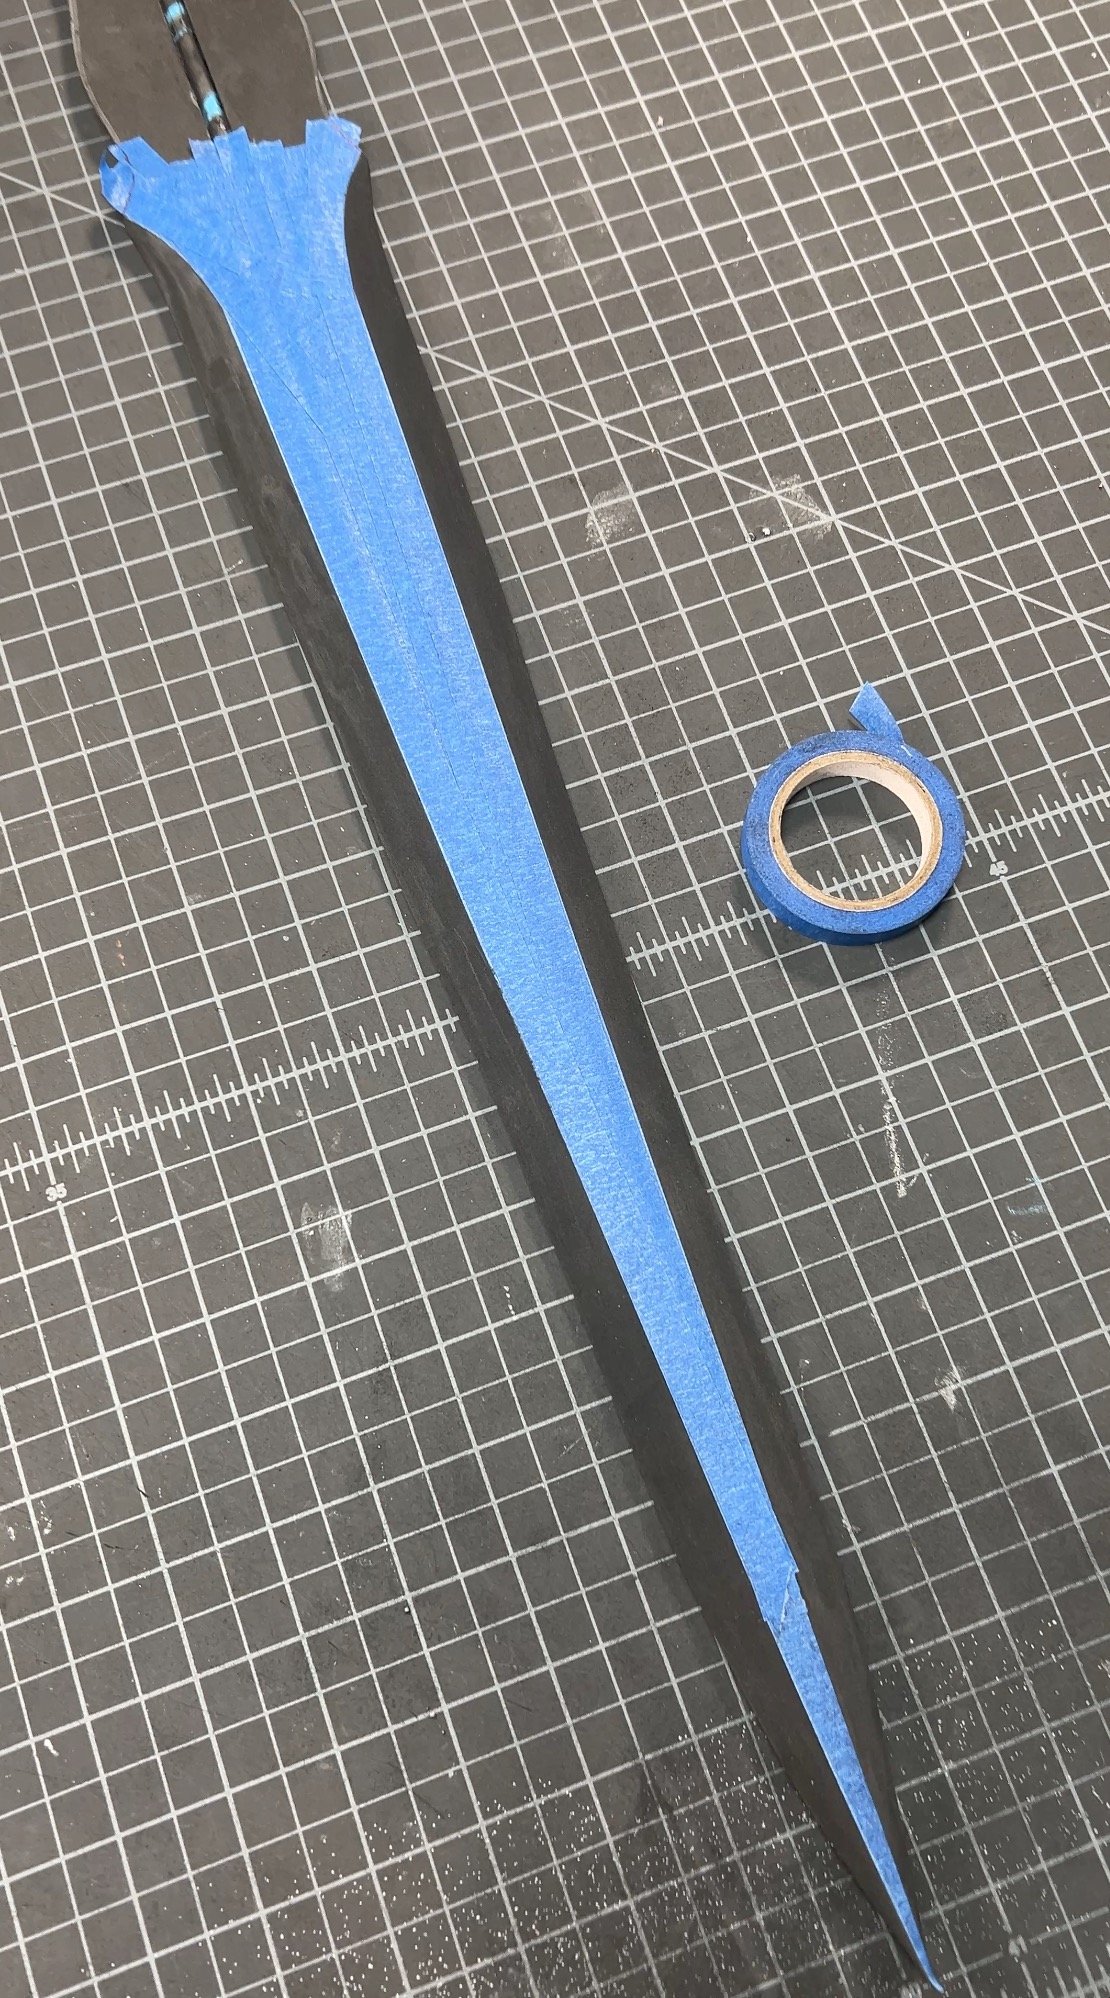
Carving the Blade
Once the core was installed, I used masking tape to help me with sanding with my rotary tool. This method helped tremendously with maintaining a symmetrical carving line. I then polished the edges with a grinding stone. This one is a chainsaw sharpening bit (Dremel #454-03).


Blade Details
Next, I used some Gap Filla to even out the surface of the core. I then cut a detail layer that would cover the center. This saved me time and sanding!


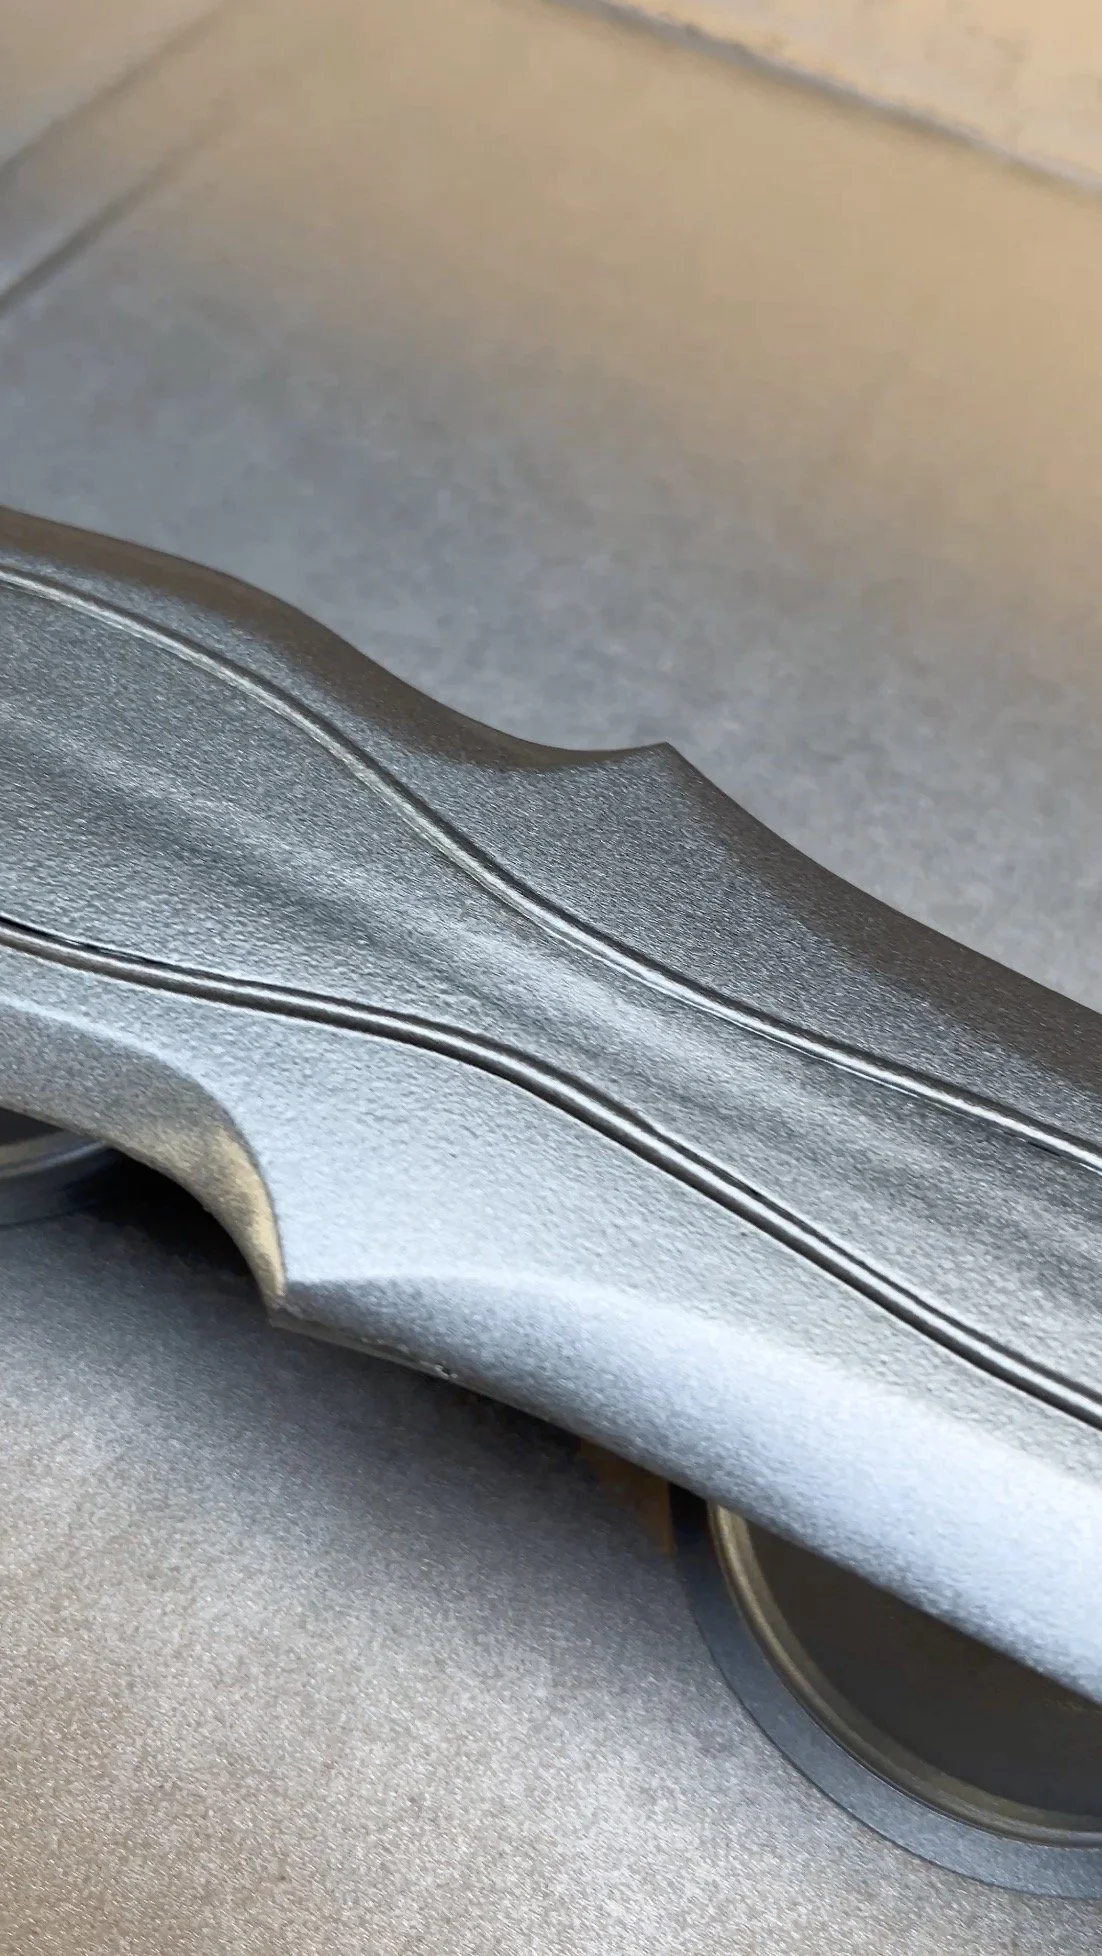
Crossguard Details
The crossguard was so much fun to carve! I got creative with texturing and beveling, all with my rotary tool. I used a rounded carving accessory bit to create the textured areas on the crossguard. I love this detail and I think it adds some visual interest that won’t require sanding (which is a bonus!).


Hilt and Pommel
I needed to add some thickness to the hilt, so I glued two layers of the EVA foam using contact cement. Then I trimmed and sanded the edges to round them out.
Then I added some fun details to the end of the hilt to act as the pommel. I have some red gems that I’ll use to make this really pop!


Ready for Plasti Dip
The sword construction is finished, and ready for Plasti Dip! I’ll be using Craft Armor and I can’t wait to get started.


Plasti Dipping
For the silver color, I sprayed several layers of Plasti Dip Craft (Armor Color).
Here is my process for good results when using Plasti Dip:
Spray outside, or in an area with very good ventilation. Always use proper PPE (gloves, respirator).
Place the can in warm water for 15 minutes before spraying.
Shake the can for the recommended amount of time, and frequently when spraying.
The first layer should be thick enough to have a wet, shiny appearance. Additional layers won’t need as much paint, but should also have a shiny, wet surface.
Wait 30 minutes between coats.
Allow to fully cure before handling.
Pro Tips: Follow the directions! You’ll have the best results when you use it during optimal humidity and temperature conditions. These are printed on the label. Use a weather app to find out what your current conditions are. This is an amazing product when used according to the directions.
I found that I was able to get better results when placing the sword flat on a surface. This allowed me to spray a little heavy for extra coverage to get the “wet” appearance. Once it cured, the surface was gorgeous. I needed about 5 layers of paint for this sword. Plasti Dip will come out beautifully if applied correctly and under the right conditions!


Final Touches
Once the sword was cured, I could remove the masking from the gem. The red really pops! Next, I used upcycled leather strips to wrap around the hilt. I secured the gem to the pommel with hot glue.


Final Photos
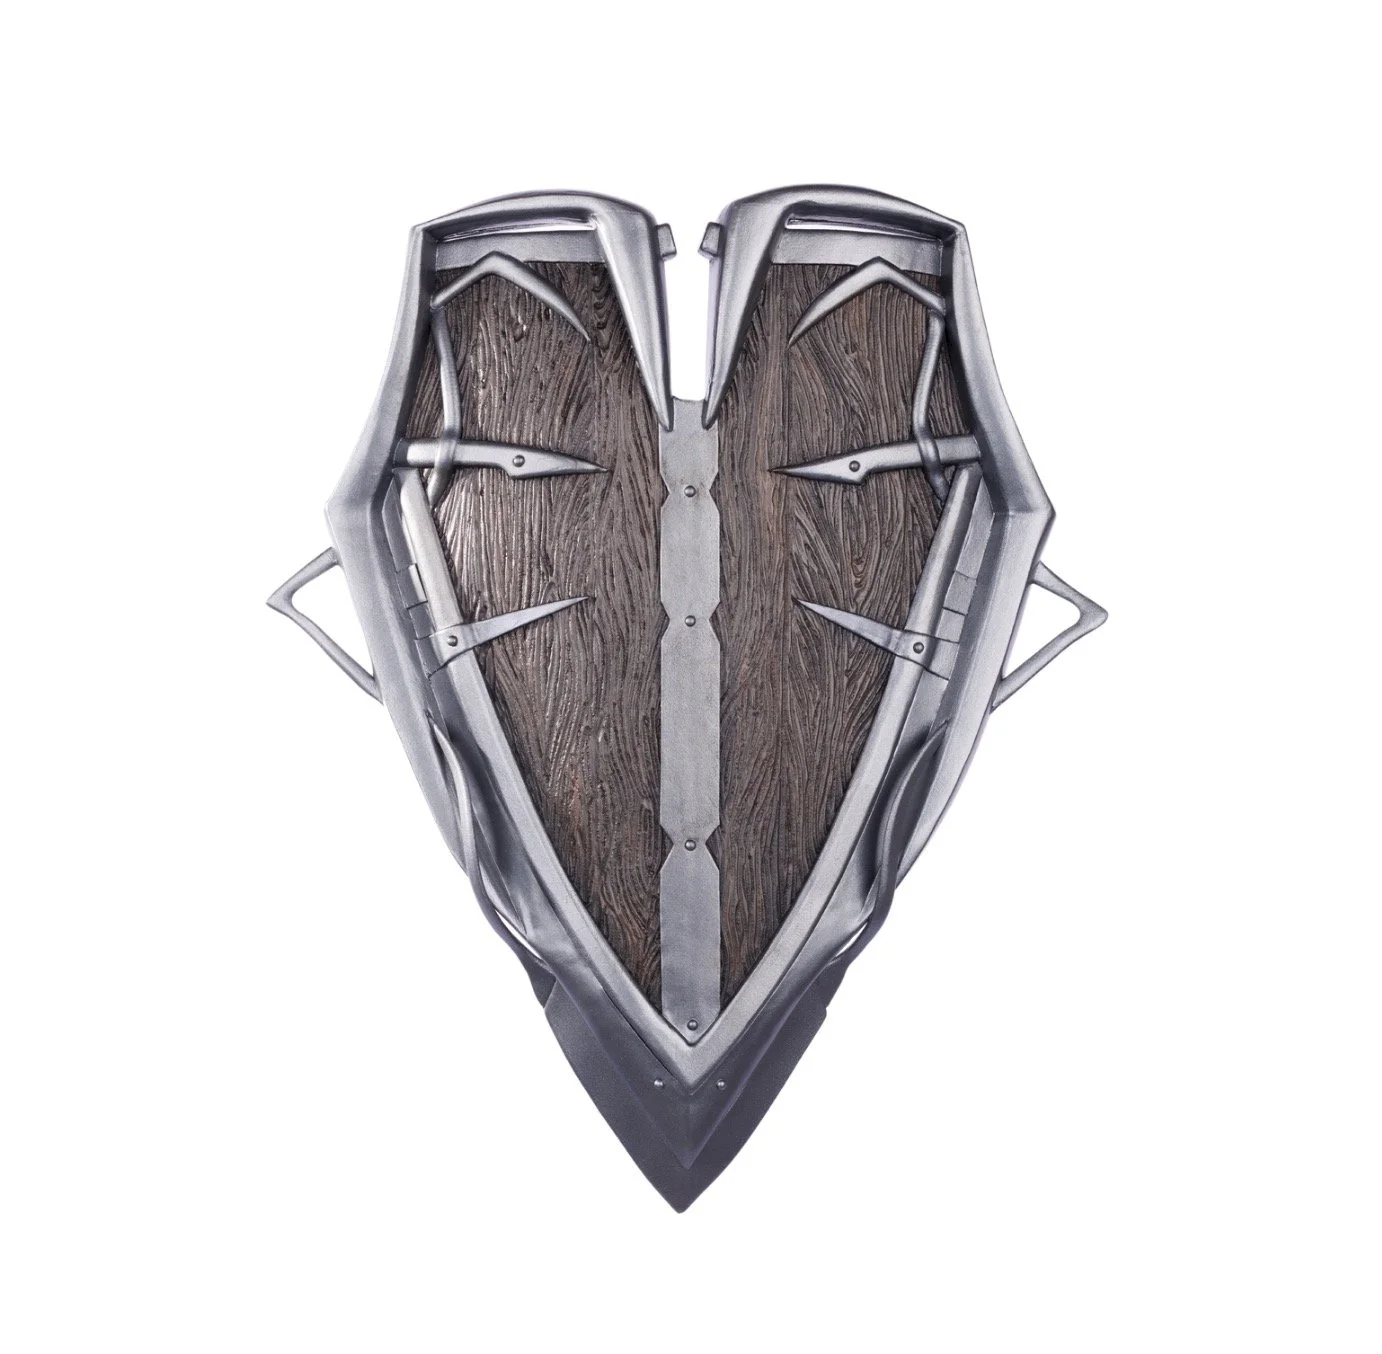
This sword is so shiny and beautiful! The silver color of the Craft Armor is perfect, and matches my Lae’zel costume and shield that I also created. It is incredibly lightweight and sturdy! Thank you again to Plasti Dip for sponsoring this project, and for working with me to bring this new Craft line of colors to the cosplay community. The Armor color is a game changer!
The Plasti Dip Craft line is sold exclusively online at https://plastidip.com/product/plastidip-craft/ with free shipping! Check it out for current pricing, shipping details, and more.